Settings
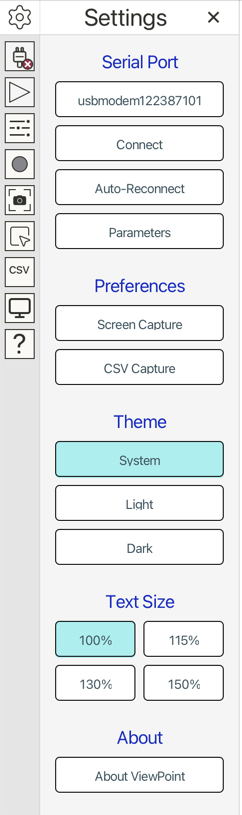
The Settings panel is available from the gear icon
![]() at the top of
the sidebar. From there you can select a serial port, adjust port parameters,
and enable Auto-Reconnect to automatically restore the last connected port
after firmware uploads. Settings also include preferences for screen and CSV
capture, theme selection, and application-wide font size presets.
at the top of
the sidebar. From there you can select a serial port, adjust port parameters,
and enable Auto-Reconnect to automatically restore the last connected port
after firmware uploads. Settings also include preferences for screen and CSV
capture, theme selection, and application-wide font size presets.
Note
On macOS, system theme changes may not always be applied automatically.
Connection Workflow
Open Settings from the sidebar to access port selection and serial parameters.
Select your device from the port list, then click Connect — the plug icon
(![]() when
disconnected,
when
disconnected, ![]() when connected) or the Connect button on the Settings panel.
when connected) or the Connect button on the Settings panel.
If VoidLoop ViewPoint™ does not see your port, make sure the Arduino Serial Monitor and Arduino Serial Plotter are closed.
| Select Port | Parameters |
|---|---|
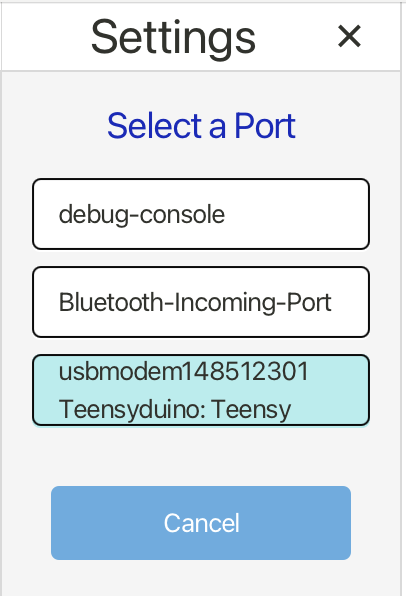 |
 |
The port selection panel (accessed by clicking the first button on the Settings panel) shows the ports currently available. The button identifies both the manufacturer and product when available.
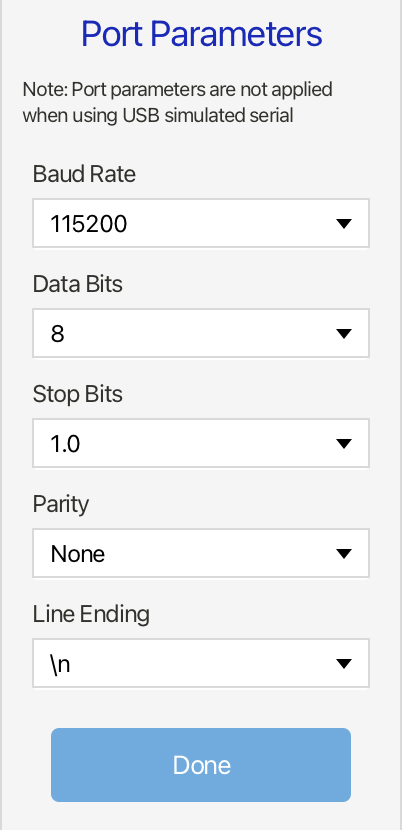
Serial port parameters can be accessed and edited with the Parameters button on the main Settings panel. These parameters are only relevant for standard, non-USB-emulated serial.
Screen Capture Settings
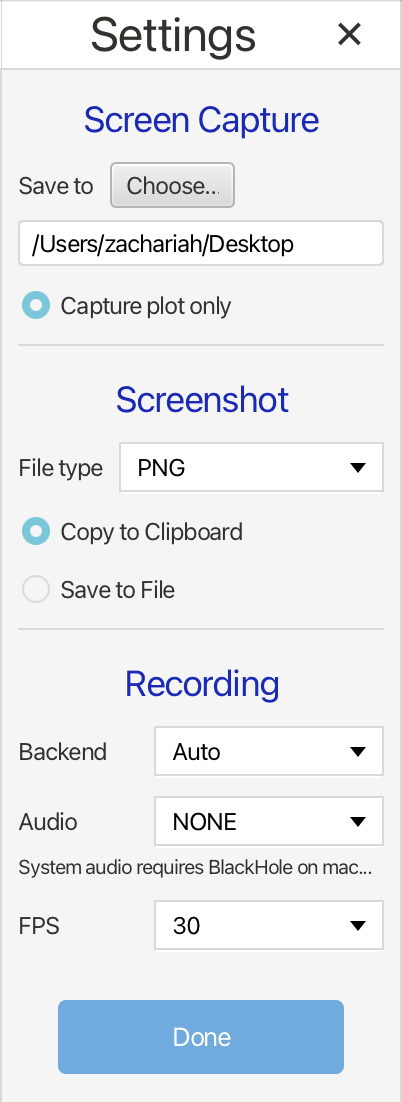
Screen Capture ![]() controls how VoidLoop ViewPoint™ saves screenshots and recordings. The default save
location is within the desktop directory, under individual screenshots and
recordings folders. This location can be changed with the Save to →
Choose… button.
controls how VoidLoop ViewPoint™ saves screenshots and recordings. The default save
location is within the desktop directory, under individual screenshots and
recordings folders. This location can be changed with the Save to →
Choose… button.
Capture plot only exports just the plot area; turn it off to capture the full application window.
Screenshots can be copied to the clipboard, saved to file, or both, with support for PNG and JPG.
For recording, JCodec works out of the box and requires no external install, but it is best for lower frame rates (10 FPS) and does not support audio.
FFmpeg requires a separate installation, but delivers much higher frame rates, better quality, and audio support.
PNG Sequence saves individual PNG frames at the selected frame rate instead of a single video file.
Note
On macOS, system-audio recording requires BlackHole or a similar virtual audio device.
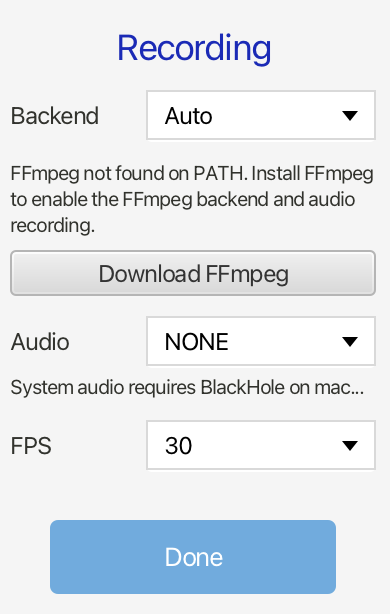
FFmpeg is external software with no affiliation to VoidLoop or VoidLoop ViewPoint™. Using it requires a separate installation — available through package managers per operating system, or by following the link above and in VoidLoop ViewPoint™.
Once FFmpeg is installed, VoidLoop ViewPoint™ should automatically detect it. If it does not, ensure FFmpeg is added to your system path or enter the custom path into the text box in the settings panel. The text box is only visible if FFmpeg is not automatically found.
When FFmpeg is installed and the backend selection is set to Auto, FFmpeg is used by default.
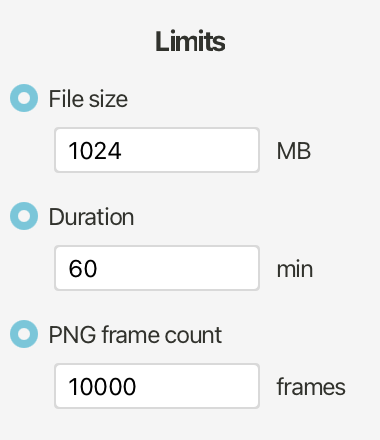
Screen capture is limited by default to either 1024 MB or 60 minutes. These limits can be adjusted or turned off from the settings menu and persist across application runs.
PNG sequence captures are limited to 10,000 frames.
CSV Capture Settings
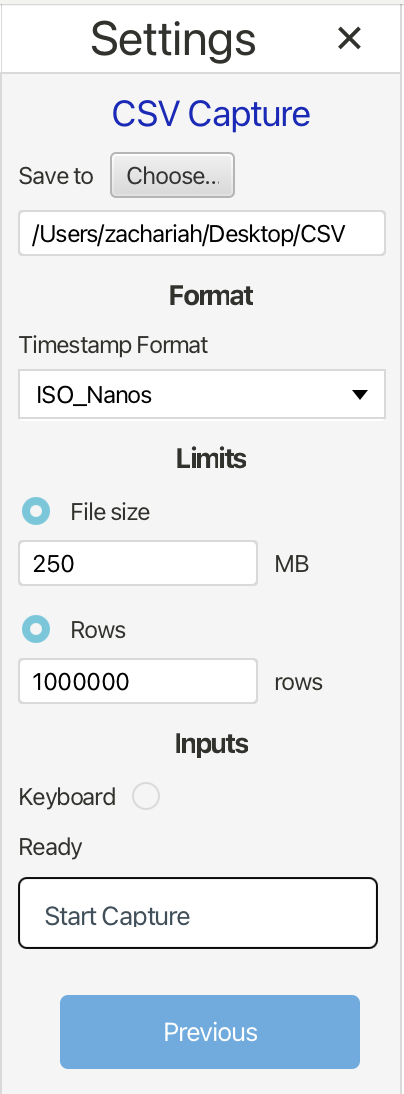
CSV Capture ![]() saves trace data to a
saves trace data to a .csv file for analysis and recordkeeping. Each capture
includes timestamps and the active trace values, with selectable timestamp
formats to match different workflows.
Keyboard capture can also be included, adding typed notes or event markers as a separate CSV column during recording. Use CSV capture when you need raw numeric data rather than screenshots or video.
Timestamps can be sent from the VoidLoop ViewPoint™ library send function.
CSV capture is primarily supported for Continuous mode, although no restrictions are in place for Frames mode.
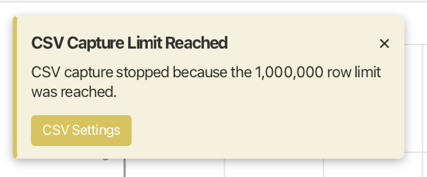
Restrictions are in place for the maximum allowed file size or number of rows. These limits are adjustable from within the CSV Capture settings panel and persist across application runs. When a limit is reached, a notification alerts you that the capture was halted.
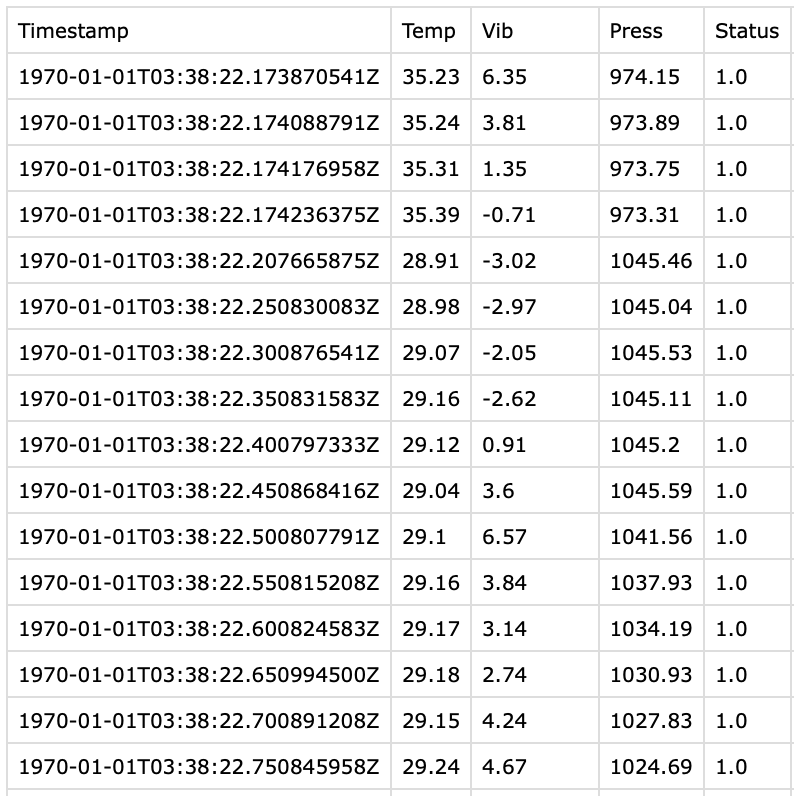
Example Output